colormegreenanewer

  • Subscribe to our RSS feed.
  • Twitter
  • StumbleUpon
  • Reddit
  • Facebook
  • Digg

Monday, January 31, 2011

Roasted Brussels Sprout, Potato, and Egg Salad

Posted on 7:01 PM by Unknown
People like to know about meals that can be easily made at home when cooking for one and cooking from scratch. This is mine, with minimum prep and minimum fuss, making just enough for dinner and lunch. I like to roast the brussels sprouts and potatoes until they are so crisp and brown that I'll happily snack on them on their own. Then I add chopped up hardboiled eggs to the equation for protein. The creamy hardboiled yolks find their way into all the nooks and crannies of the salad, transforming what could be soggy leftovers into more goodness for lunch the next day. If you prefer runny yolks, poached or soft boiled eggs will also work, but I feel that hardboiled are best for leftovers.


My only problem is that I haven't found a new reliable source for brussels sprouts. Having access to good produce at the Park Slope Food Coop made me lazy. I used to get cheap brussels sprouts there almost every week. Last winter was the year of brussels sprouts, and I was continuing on that path this year until I moved back to Williamsburg this month, away from the Coop. I can't always count on finding brussels sprouts at the farmers market. Last Saturday at Union Square there were just a lot of onions, apples, carrots, and squash. But it all depends on the day and the market, so it's time to recommit to my former routine of going to the McCarren Park farmers market every Saturday, and stopping in at Union Square on weekdays to check out the selection, (which should be especially easy now that I work downtown within walking distance - no more corporate midtown for me!)


Roasted Brussels Sprout, Potato, and Egg Salad
Preheat oven to 450. Rinse and chop one medium potato into small wedges (the smaller, the faster they cook). Pour olive oil liberally over a baking sheet, as well as salt and pepper. Toss the potatoes onto the tray, adding more oil, salt, and pepper and stirring around until thoroughly coated and evenly distributed so that each potato slice gets surface space. Put in the oven to roast.
While they start cooking, rinse about a dozen brussels sprouts, chop off the ends, and slice in half. Likewise prepare the sprouts on an oiled and seasoned pan. Roast for about half an hour, removing both potatoes and sprouts halfway to flip each vegetable slice over to allow the other side to brown. This is also a good time to munch on the leaves that have fallen off the brussels sprouts and crisped. Meanwhile, hard boil three eggs. I like these instructions for hard boiling. Once the eggs have cooled enough to peel and chop, mix it all together and enjoy. Makes two servings.
Read More
Posted in Eats: Gluten Free, Eats: Meaty, Eats: Vegetarian | No comments

Sunday, January 9, 2011

So this is the new year

Posted on 6:17 PM by Unknown
The new year doesn't necessarily mean anything besides a change in the date, but 2011 really is a new year for me. In the past week, I moved into a new apartment AND started a new job. It feels good to finally be in the places personally and professionally where I have long wanted to be. I've come a long way from a year ago, when I was in the dark nadir of a three+ year rut. The summer saw me take the courage to make one key change for the better, which set off a domino effect of good things coming my way in the months since.

I already made resolutions of sorts when I posted my list of 25 (actually 26) things to do before turning 26 in November. I'm not making new resolutions now, but have revisited the list and will continue to work my way through these goals and others as they come.

More importantly, a recent sad event served as a reminder that tomorrow isn't promised today. It forced me to reflect and realize I'm doubly glad that my life is on the right path now, because as cheesy as it sounds, life is too precious to let it pass by. It was a reminder to do the things that make us happy, and to not just think about them, but to make them happen. So that is my real new years resolution: to keep making the good things happen.

1. Visit Gina in Colorado. 11/4-11/8 recap pending
2. Visit little miss homebuyer Caitlin's new house upstate. 8/21 a night at her lakeview bungalow with a fire pit!
3. Visit the Jersey shore with my family. last weekend of August
4. Have a dance party in an apartment. 7/24 one of Jamie's infamous dance parties until the sun came up.
5. Go to a dance party at a bar. 10/30 Halloween party at Union Hall and others since.
6. Stay up until sunrise. see #4
7. Throw a party. 9/24 party with cupcakes
8. Host Thanksgiving. FAIL in 2010. cooked all the side dishes for Thanksgiving 2011.
9. Attend more concerts. have been good about going to about 4 shows a month.
10. Get a tattoo, or think about getting one. decided not to get one because i am worried about putting toxic inks into my body.
11. Bike to work. have been bike commuting 20-40 miles a week since march
12. Do the New York Century bike ride. 9/12 recap here
13. Attend a Transportation Alternatives meeting. got involved with the Bushwick Food Coop instead.
14. Go no 'poo (no shampoo that is). have been shampoo free since 3/5
15. Make homemade deodorant and other body products. made deodorant in October 2011; need to blog about this
16. Trim my hair. 12/25/2011
17. Write something every day. started a journal to write at least a sentence or more about each day.
18. Write a new song. 9/9/10 done, several written since then.
19. Play a show at Rockwood Music Hall. it's harder to get a show at Rockwood then I thought. played four shows in 2011.
20. Collaborate with musical friends. joined the band Sexy Neighbors
21. Play in the folk jam at Sunny's in Red Hook.
22. Audition for a choir. 8/15/10 waitlisted. not currently interested in joining a choir again. 
23. Fit into my skinny pants. decided i don't care as long as i know i'm getting my exercises in by bike commuting and feel healthy
24. Model in a shoot for my photographer friend. she shot my band photos but still no solo promo photos.
25. Knit a scarf. 10/19/10 birthday gift for a friend. March 2011 knit a scarf for myself as well.
26. Get a new job. 9/9/10 new position at same organization....1/4/11 new job at new organization!!
Read More
Posted in Life Happens | No comments

Saturday, December 18, 2010

Squash and Leek Stuffing

Posted on 5:49 PM by Unknown
I haven't been much in the holiday spirit here, aside from enjoying the brisk December weather. I've been too preoccupied by more big life changes over the past month to be able to pay attention to Thanksgiving or Christmas. I failed in my goal to host Thanksgiving (as happens almost every year) and only contributed one side dish for my mother's Thanksgiving meal (this squash and bean casserole). I haven't procured any Christmas gifts yet (hopefully tomorrow...). There are no holiday decorations up in my apartment, since I should be packing up anyway for another move at the turn of the month. I've even been neglecting this blog, seeing now that it's been a month since I last wrote!


But last week I made a squash and leek stuffing, presented in a hollowed-out squash, which felt ever so seasonally appropriate. I was inspired by a stuffed pumpkin my roommate made this fall, as well as a delicious looking pumpkin with panade on Tea & Cookies. However, I've found that when you bake it all together, the squash remains too firm for my liking. To solve this, I roasted my squash first, and then scooped out the pureed flesh to mix into a stuffing with cubes of crusty bread, sauteed leeks, and cheese, and refilled the squash rinds for a final bake.


I'm taking several days off for the holidays and hoping I'll have time then to get excited about festive baking and cooking, including pumpkin snickerdoodles and almond biscotti. Now the question remains, should I make this stuffed squash, or maybe pizza with a side of swiss chard gratin, for my family's Christmas eve dinner?


Squash and Leek Stuffing

I used one delicata squash, but you could also use any other variety of squash or pumpkin. Slice squash in half, and place it in a pan, flesh side down with a few inches of water. Roast at 450 degrees for 30-60 minutes until easily mashable with a fork. Scoop out all the flesh out into a bowl, being careful not to tear the squash rind (unlike me).

While the squash is roasting, clean one large leek and slice into half moons. Sautee on low heat until softened.

Rip a day-old crusty baguette into small cubes.

Grate about a cup of cheese. Cheddar, gruyere, swiss, or any combination of these varieties would be nice.

Combine squash, leek, bread, and cheese in a bowl, with salt and pepper to taste. Fill empty squash rinds with stuffing and sprinkle additional grated cheese over the top. Return to the oven and bake at 450 for 10-15 minutes until the cheese and stuffing edges turn golden brown.

Makes two servings.
Read More
Posted in Eats: Vegetarian, Eats: Veggies | No comments

Tuesday, November 16, 2010

Knitting and Thinking Harder about Handmade

Posted on 9:19 PM by Unknown
On average, I knit about one scarf each winter, using the most basic knit pattern, which is the limit of my knitting skills. This year I got a headstart and already completed one scarf for a birthday gift. In the past I have simply picked out yarn from a store based on cost, color, and feel. However, while making homemade gifts and buying handmade items has become a rallying cry and an important way to keep money out of corporation's pockets and support small businesses instead, sometimes simply handmade is not enough. In fact, one of the benefits of handmade is that you can exert more of a direct influence over the materials used.

So I started to think harder about the source of my scarf materials. If it's wool, what were the conditions of the animals raised for wool? Did the wool travel halfway around the globe to get to me, from Australia and New Zealand, which are the leading wool producers? If it's cotton yarn, what about pesticides? If it's acrylic, it's manufactured with polycrylonitriles, which may be carcinogenic. And then there are the dyes, probably laden with toxins rubbing up against your chin as you try to keep warm.


This batch of yarn came from happy sheep upstate, care of Catskill Merino, a farm that sells lamb meat and hand-dyed wool at the Union Square Greenmarket on Saturdays. You may have noticed their gorgeously colored natural-dyed skeins while passing through the market. This fascinating Osage and Logwood color looks gray-green indoors with highlights of lime green in sunlight. The yarn is soft and I loved working with it. It wasn't that much more expensive than "nice" wool at a regular yarn store, so I felt it was worth it. There are many other eco-friendly yarn options out there, and alternatively, you could also check out your local thrift store for yarn or unravel an old sweater to reuse.


I like that kniting lets me relax and feel productive at the same time. It's a welcome way to slow down in this busy era of life when I feel I should always be accomplishing something with my time. The repetitive process is a meditative kind of multi-tasking, knitting while sitting around the living room watching TV with roommates or chatting on the subway.

I've got more yarn leftover from a lazy scarf fail last year, so I think a friend or family member might find a scarf under their tree this December. Who wants one? I'm considering expanding my repertoire to add some kind of pattern this time. This holiday season, I challenge you to also not only buy or make handmade gifts, but to think harder about handmade.


hanging yarn photo via flickr
Read More
Posted in DIY, Eco-conscious | No comments

Tuesday, November 9, 2010

Canning Pickles and a Word about Skillshares

Posted on 7:03 PM by Unknown
At the skillshare in September, we also made pickles and pizza, in addition to beer. We followed a recipe for canned garlic and dill pickles that Sarah learned at a pickling class at the Brooklyn Kitchen led by Bob McClure. I thought I didn't like fresh dill in my pickles, but I was wrong, because these were great and tasted simply as pickles should. In fact I liked them so much that I was willing to join a daring round of shots of pickle brine when we found ourselves snacking on the finished pickles a week later.


I'd only ever made lazy refrigerator pickles using storebought pickling spice mixes, which is easy and quick for making a jar at a time. Canning is a longer process, but worth it if you want to stockpile pickles. Afterward, we worried that the cans didn't sealed properly and decided to store them in the fridge, but it turns out they had indeed sealed. We put them in the fridge too early, but you should leave your cans out overnight to completely cool before testing the seal. Click here for more on how to know if your cans sealed.


As for skillshares, they have been popping up as a cheap alternative for learning new skills and trying new activities without having to pay for classes. Brooklyn is now home to its own annual Brooklyn Skillshare day each fall with classes ranging from composting to yoga to bike repairs. Skillshares can also be a great way to spend time with friends or get to know your community better. Ours was smallscale with just three people and three food-related skills, but even so, I have a few tips.

* Figure out ahead of time what you will need to bring with you. We got a late start because our host didn't have all the kitchen tools on hand (tongs, etc) we assumed he might, so there were some runs to pick up supplies.

*Plan complementary activities. For example, beer brewing and canning both require long periods of boiling in a giant pot, and there was only one giant pot, so it probably wasn't the best idea to do them in the same day. It all worked out okay, it was just a late night by the time everything was finished.

*You might also want to make plans for food or breaks. Originally I was going to bake bread as my skill, but I am really glad that I made pizza instead so that we were able to have a meal during the long day.

What skill would you teach if you organized a skillshare with your friends?


McClure's Garlic and Fresh Dill Canned Pickles

3 lbs small pickling cucumbers (Kirby)
6 cloves of garlic
1 bunch of dill
1 1/2 cups of water
1 1/2 cups distilled white vinegar (5%)
little less than 1/2 cup picking or Kosher salt
crushed red pepper (optional)
6 canning jars

1) Wash cucumbers and place in a large deep bowl with ice. Cover and put in fridge.
2) Wash dill and chop off roots
3) Place minced garlic in a small bowl and pour hot vinegar over it. Let stand for 1 minute then pour vinegar out.
4) Fill a large pot with water. Place a jar in the pot and make sure the water is at least 1 inch above the top of the jar. Remove the test jar and bring water to a boil.
5) In another large pot, combine the vinegar, water, and salt. Bring the brine to a rapid boil. Stir the salt to make sure it doesn’t stick to the bottom of the pot
6) While pots are getting up to a boil take cucumbers out and quarter them. Make sure cucumber will stand 1/4 to1/2 inch below the rim of the jar.
7) After water is boiling, submerge mason jars and lids in pot and sterilize for about 90 seconds. Remove carefully with jar tongs.
8) In each jar, place garlic, dill and then enough cucumber spears to fill the jar, making sure cukes are below the “neck-line”.
9) Fill jars with hot brine and add an optional pinch of crushed red pepper.
10) Cap and seal jars. Turn them over to make sure you have an adequate seal. Repeat until all jars are complete
11) Place jars back in boiling water pot. Process sealed jars in boiling water for 10 minutes.
12) Let cool. Wait a week to two weeks before eating. Pickles will keep up to 1 year if stored in a cool, dry place.
Read More
Posted in Eats: Condiments Dips Pickles, Eats: Gluten Free, Eats: Meaty | No comments

Sunday, October 24, 2010

Why Go Apple Picking?

Posted on 10:56 PM by Unknown
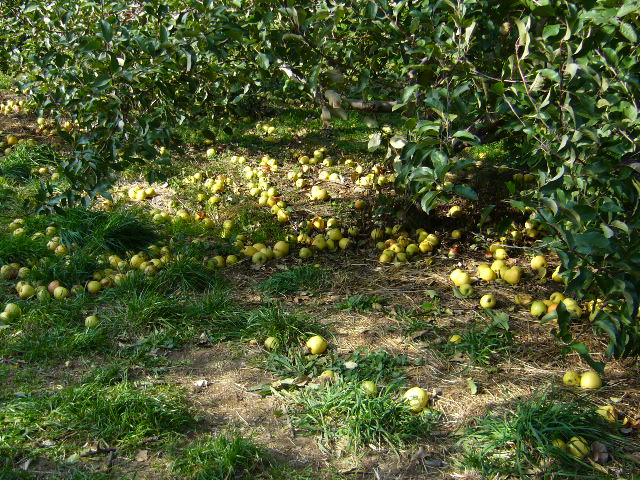
Someone recently asked me "Why go apple picking? I don't understand the appeal/point." Here's my answer.

To support small farms that depend on income from apple-picking tourists. Because making a living profit from farming and resisting the pressure to sell off farmland to McMansion developers are hard to do these days. The cost of Pick Your Own is still about the same as already-picked apples for sale at farmers markets or stores, around $1/lb, but the farms deserve to make money for their labor of growing the apples. And it's about the experience.


For the pleasure of walking around beautiful orchard paths and fields in good company on a sunny fall afternoon.


For insanely good views of fall foliage


For climbing trees to snare hard-to-reach fruits, especially late in the season.


For snacking on juicy freshly picked apples.


For the exercise that comes with carrying around a twenty pound half bushel bag.


For the vinegary smell of fallen rotting apples that might inspire you to make your own hard cider or try some from the local wineries.


For saying hello to goats that live in barns.


For picking out a pumpkin to carve.


For the sound of children running around. And for rolling down hills like children.


For spying on honeybees and buying local honey from the farm store.


For rewarding yourself afterward with hot cider and freshly made donuts.


For bringing home tons of apples to eat, to freeze, to make crockpot applesauce, apple pie, apple muffins, apple cake, apple pancakes...

My place of choice for apple picking is Ochs Orchard in Warwick, NY, ninety minutes outside NYC, for its stunning views, charming farm store, and proximity to my childhood home. To find a Pick Your Own farm near you, take a look through this comprehensive list of farms in the US, Canada, Britain, and other countries.

photos 1, 3, 4, 5, 8, and 10 by Jamie Santamour. rest by me.
Read More
Posted in Upstate | No comments

Monday, October 11, 2010

Homebrewed Pumpkin Ale

Posted on 10:12 PM by Unknown
I got together with friends for a skillshare day a couple weeks ago. Among the various food and drinks we made, the highlight was pumpkin beer, led by our resident expert homebrewer who provided all the necessary equipment. As a craft beer snob, I have always been curious about homebrew, so I was psyched to get an inside look at the brewing process.


Fall is the perfect time to make pumpkin ale. Like Sixpoint Craft Ales did for their Pumpkin Brewster beer, we chose to use real pumpkin rather than canned. I roasted a three pound sugar pumpkin, which yielded approximately 3 cups of puree, or the size of a 30 ounce can of pumpkin. Why use canned when you can easily get fresh, local pumpkins this time of year? Make sure it is a sugar pumpkin, though - the same kind used for baking, and not a regular jack-o-lantern pumpkin for carving.


Roasting a pumpkin is easy: Slice the pumpkin in half, scoop out the guts, and place it on a deep baking tray, flesh side down, in an inch or so of water. Roast at 450 for about 40 minutes, until flesh is tender and easily mashed with a fork.


I also roasted pumpkin seeds to snack on during the skillshare: Separate and rinse the seeds from the goop in the center of the pumpkin, toss in olive oil, salt, and pepper, spread seeds out in an even layer on a baking sheet, and roast for about 10 minutes. Crispy pumpkin seeds are addictive.


You can now find brewing supplies in Brooklyn at places like The Brooklyn Kitchen and the Brooklyn Brew Shop, but this kit was ordered online from Midwest Supplies. It was handy how everything came included in the box, even various spices associated with pumpkin pie like cinnamon and nutmeg. The complete recipe we followed can be found here.


It is important to keep in mind throughout the process that everything needs to be cleaned and sanitized, including the stirrer spoon, fermenter jugs, and transfer tubes. The first step was to bring a giant pot of 3 gallons of water to 155 degrees, which took a long time - probably over half an hour. We then steeped a bag of crushed grains in the hot water for 30 minutes. Then we removed the pot from heat and let it sit for another 5 minutes before discarding the grains.


Next, we stirred in a whole container of malt syrup, which is similar in consistency to molasses, as well as brown sugar, although most beers do not typically require sugar at this stage.


After adding the malt and sugar, we brought the water to a boil, added half the hops, and let it boil for 60 minutes. At 55 minutes, we stirred in the pumpkin puree, and at 58 minutes, we added the remaining hops and spices. Here you can see the pumpkin swirling in the wort as it boiled. Note: during this first day of the brewing process, the beer is called "wort."


Afterward, we had to cool the wort to 80 degrees, which we did by putting the pot in a sink filled with ice and cool water. This also took a long time, another half hour or hour, as we swapped out the water every 10 minutes or so to continue the cooling. The sink nearly overflowed as the ice melted.


Once the temperature dipped below 80 degrees, it was time to transfer the wort from the pot into the primary fermenter, a large glass jug.


Normally, the wort should keep streaming on its own through the tube after a couple pumps. However, the pumpkin sediment prevented a steady stream, so it took some time to manually pump all the beer into the fermenter. Somehow, beer sprayed everywhere when the tube accidentally got off course. I think we had one too many (storebought) beers to drink during the course of the skillshare day.


The final step was to add proofed yeast (similar to baking bread) to the top of the jug. This airlock stopper was put in place to allow air to escape without letting air or bacteria enter as the beer bubbled away occasionally for a few days. After a week, it was transfered to the secondary fermenter, or a second glass jug, to help reduce sediment.


Another week later, it was time for bottling. At this time, the beer is done fermenting, and a little sugar was added just before bottling to activate the carbonation process. We rinsed, sterilized, and rinsed again about 40 beer bottles and caps. You can collect empty beer bottles and recycle them for this second life. Using a special tube, we transfered the beer into the bottles, and capped off each one.

Normally you can get up to 50 bottles from a five gallon batch, but again, the pumpkin sediment caused some problems. Toward the bottom of the batch, sediment blocked the beer from flowing into the bottles, so we had to scrap the last dregs. In total, we ended up with 39 bottles. Lesson learned: beer with pumpkin or other ingredients added are tricky to work with.

We poured a sip to try, and it definitely tasted like a pumpkin ale, with a little sweetness and bitterness, but unfortunately it did not seem very strong. For whatever reason, it didn't bubble or ferment for as many days as normal. Now that the beer is bottled, it will be ready to drink in two weeks, and hopefully the taste will improve with carbonation. I am excited to drink it!
Read More
Posted in DIY, Imbibing | No comments
Newer Posts Older Posts Home
Subscribe to: Posts (Atom)

Popular Posts

  • Beet and Roasted Garlic Cheese Crostini
    My parents made a monumental trip the other day - not in distance, as it is only 56 miles from their home to mine , but psychologically, sin...
  • a New Economy
    While I feel good about my personal efforts to cut back on consumption and not suport big corporations, some have remarked to me that, ...
  • Changing?
    Things are changing in the world of the Wounded Chef. But despite this, I still managed to get some fresh local foods in me. Last weekend, I...
  • Rosario
    Next up, for the third day of our trip, we headed to Rosario, a city about three hours northwest of Buenos Aires that is home to my friend M...
  • Turning Up and Down the Heat
    In past winters, Crunchy Chicken has encouraged people to join a Freeze Yer Buns Challenge to lower your thermostat as much as you're ...
  • Reducing Plastic
    I was recently reminded by an article in the New York Times about the dangers lurking in plastic. It highlighted a study which "found ...
  • Yard: Farewell Flowers
    This yard was just grass and dirt and ivy and weeds when we moved in, and we transformed it into something better. As I've mentioned bef...
  • The Weekend
    It was finally warm enough this weekend to walk outside bare legged (!). Makes SUCH a difference. After a pre-dinner trip to the Split They ...
  • The Richardson
    via yelp Now that I'm feeling well enough to do more than just plop into bed after work, I went to check out a new bar in the hood, The...
  • The Story of the Seltzer Maker
    One afternoon my boyfriend called me up at work and excitedly told me he wanted to buy a seltzer maker. I'd read about the environmental...

Categories

  • Bars and Restaurants
  • Biking
  • Brooklyn
  • City Living
  • Dark Days Challenge
  • DIY
  • Eat
  • Eats: Baked Goods and Desserts
  • Eats: Beans
  • Eats: Breadstuffs
  • Eats: Brunch
  • Eats: Condiments Dips Pickles
  • Eats: Crockpot
  • Eats: Eggs and Brunch
  • Eats: Gluten Free
  • Eats: Grains
  • Eats: Grillin'
  • Eats: Meaty
  • Eats: Pizza and Bread
  • Eats: Pizza n Pasta
  • Eats: Salad
  • Eats: Seafood
  • Eats: Sides n Snacks
  • Eats: Soups n Stews
  • Eats: Vegan
  • Eats: Vegetarian
  • Eats: Veggies
  • Eco-conscious
  • Entertaining
  • Farmers Market Hauls
  • Green Phone Booth
  • Guest Posts
  • Home
  • Imbibing
  • Life
  • Life Happens
  • Life Lists
  • Manhattan
  • Mindful Spending
  • Music
  • One Local Summer Challenge
  • Outside
  • Plants
  • Pretty Things
  • Pups
  • Reads
  • Recipe Archive
  • To Do
  • Travels
  • Upstate
  • Weekends

Blog Archive

  • ▼  2013 (18)
    • ▼  October (1)
      • A Crockpot Primer and Two Bean Quinoa Vegetarian C...
    • ►  September (3)
    • ►  June (2)
    • ►  May (3)
    • ►  March (3)
    • ►  February (2)
    • ►  January (4)
  • ►  2012 (37)
    • ►  December (2)
    • ►  November (3)
    • ►  October (2)
    • ►  September (6)
    • ►  August (6)
    • ►  July (1)
    • ►  June (3)
    • ►  May (3)
    • ►  April (3)
    • ►  March (6)
    • ►  February (1)
    • ►  January (1)
  • ►  2011 (43)
    • ►  December (4)
    • ►  November (3)
    • ►  October (5)
    • ►  September (4)
    • ►  August (9)
    • ►  July (2)
    • ►  June (1)
    • ►  May (3)
    • ►  April (5)
    • ►  March (2)
    • ►  February (3)
    • ►  January (2)
  • ►  2010 (53)
    • ►  December (1)
    • ►  November (2)
    • ►  October (2)
    • ►  September (5)
    • ►  August (5)
    • ►  July (3)
    • ►  June (5)
    • ►  May (8)
    • ►  April (6)
    • ►  March (8)
    • ►  February (3)
    • ►  January (5)
  • ►  2009 (109)
    • ►  December (5)
    • ►  November (9)
    • ►  October (8)
    • ►  September (4)
    • ►  August (14)
    • ►  July (17)
    • ►  June (2)
    • ►  May (10)
    • ►  April (13)
    • ►  March (6)
    • ►  February (12)
    • ►  January (9)
  • ►  2008 (98)
    • ►  December (5)
    • ►  November (12)
    • ►  October (8)
    • ►  September (7)
    • ►  August (9)
    • ►  July (9)
    • ►  June (8)
    • ►  May (6)
    • ►  April (4)
    • ►  March (7)
    • ►  February (12)
    • ►  January (11)
  • ►  2007 (39)
    • ►  December (11)
    • ►  November (6)
    • ►  October (2)
    • ►  September (4)
    • ►  August (4)
    • ►  July (6)
    • ►  June (1)
    • ►  March (5)
Powered by Blogger.

About Me

Unknown
View my complete profile