colormegreenanewer

  • Subscribe to our RSS feed.
  • Twitter
  • StumbleUpon
  • Reddit
  • Facebook
  • Digg
Showing posts with label Eats: Condiments Dips Pickles. Show all posts

Monday, May 7, 2012

Moving into Spring

Posted on 9:00 PM by Unknown
The weekend before last, I finally left the apartment where I lived in bed bug fear and moved into my boyfriend's apartment. We both love cooking, so now that we're cohabitating, we are enabling each other to cook a lot (perhaps too much?). In the past week alone, we made quite a few excellent meals sourced mostly from the greenmarkets - because early spring vegetables are here!


Lamb burgers with the whites of ramps diced and mixed into the patties and the greens of ramps sauteed on top with melted cheddar cheese. Fiddleheads were blanched and then sauteed to ensure they were thoroughly cooked (they are poisonous raw). This was my first time trying fiddleheads, which like ramps, are foraged this time of year. I wished we had cooked them long enough to brown and crisp to add more flavor, because I found the fiddleheads too earthy and bland. There were also roasted potatoes.

Friends came over for dinner on Cinco de Mayo, so we made pulled pork tacos. The pork shoulder (from Flying Pigs Farm) was rubbed in garlic, cumin, paprika, onion powder, salt and crushed red pepper. We put it in the slow cooker fat side up with a bottle of black Irish lager and the juice of half a lime and let it sit on high for 3 hours and then low for 4 hours until it was tender enough to pull apart with a fork. For toppings, I prepared a slaw of thinly sliced cabbage and scallions; chopped cilantro; shredded cheddar cheese; pickled radishes and wedges of lime. In the past I've always made pulled pork with barbecue sauce, so this was a refreshing change of pace. Perhaps letting the rub sit overnight would have imbued it with more flavor.

Salad of smoked trout from Max Creek Hatchery, pickled radishes, arugula, lightly oiled and toasted homemade croutons with a dressing of apple cider vinegar and olive oil.
Read More
Posted in Eats: Condiments Dips Pickles, Eats: Gluten Free, Eats: Meaty, Eats: Salad, Eats: Sides n Snacks, Eats: Veggies | No comments

Sunday, December 25, 2011

Make Your Own Mustard

Posted on 5:33 PM by Unknown
When I went to my make mustard for my father's holiday gift this year, I realized that I've never posted the go-to recipe I've been using for years now. The concept behind making mustard is very simple: soak mustard seeds in a vinegar-based liquid and then blend it. That liquid can be just vinegar and water, but I like to use beer or wine for more flavor, as well as honey for some sweetness to offset the spiciness. You can also add whatever spices your heart desires for endless variations. Despite using white seeds, which actually look yellow and are supposed to be the most mild of the types of mustard seeds, this comes out hotter than the storebought stuff and takes a few weeks to mellow out. I also recently learned you can heat the liquid first, which will cut the mustard's bite, but I haven't tried that yet.

Mustard seeds can be found in the spice section of most grocery stores. Some seeds I've bought are harder to blend than others for no apparent reason and result in a coarser mustard - just a warning. This makes a very simple gift, which you probably wish I told you a few weeks ago, or is a simple way to impress barbecue guests, or is just a good thing to have in your fridge since the anti-bacterial properties of mustard mean it will last for months.

Also, happy holidays!

Homemade Spicy Honey Mustard

1/4 cup white mustard seeds
1/4 cup beer or wine
1/4 cup white vinegar
1 tbsp whole peppercorns
1 tsp salt
1 tsp tumeric
1 tsp mustard powder
1 tbsp honey

Combine all ingredients in an empty jar* and put in the fridge for a week. One to seven days later, blend the mixture until seeds are mostly ground and it reaches your desired consistency, adding a little water a tablespoon at a time if necessary.

* It is suggested that you rinse and save salsa and peanut butter jars since they are perfect for homemade condiments.
Read More
Posted in DIY, Eats: Condiments Dips Pickles, Eats: Gluten Free, Eats: Meaty | No comments

Monday, April 4, 2011

Making Cheese

Posted on 8:45 PM by Unknown
Following butter, next in the homemade dairy adventures was cheese! As I've mentioned, I get raw milk from the Bushwick Food Coop. I find that the raw milk goes sour tasting faster than I can drink it. I was ready to throw it out, until a fellow coop member filled me in on the fact that soured raw milk is still edible and can be saved for other uses. Apparently, raw milk has beneficial bacteria and enzymes that make it more easily digestible and kill pathogens, so it continues to be safe and nutritious after it starts to taste sour. In contrast, pasteurized milk extends the initial shelf life and eliminates disease risk, but becomes putrified and unsafe after it goes sour. I don't fully understand it, but you can find more information on this here and here and here.


I looked up uses for sour milk - I don't like yogurt so that was out. I wanted to make cheese, but nothing complicated involving rennet. Then I remembered Rachel's simple paneer from Heart of Light. Sold. Then poking through some old magazines I stumbled across directions for making ricotta in an old Diner Journal (offbeat food publication made by the folks behind Diner restaurant in Brooklyn). The directions for both are quite similar, one calling for lime juice and the other for vinegar. After making it, the texture reminded me of the goat cheese my mom made when I was young, and sure enough, she said she used the same process but calls it "farmers cheese." So whatever you want to call it, it was a snap to make.


Heat whole milk until nearly boiling, add an acid such as vinegar (which is what I used) or lime juice, and then let the curds (solids) separate and rise to the top from the whey (liquid). My instructions told me the whey would turn clear, which it never did. I also found curds hanging at the bottom of my pan in addition to the top, so maybe I didn't cook it long or hot enough for them to separate sufficiently. Not sure. Regardless, I spooned out the curds with a mini colander (or slotted spoon would work) and then laid them in a rag (any thin dishcloth or cut up sheet or cloth napkin etc would work here if you don't have actual cheesecloth) over a larger colander and let drain for a half hour. Then twisted the rag around the curds to strain out more liquid and let it drain another half hour before putting in the refrigerator to firm. I added the olive oil and rosemary later, mashing it up into small pieces which is the texture you see below. My cheese was still good in the fridge a week after making it.


Coming from soured milk, it had a little sour tang, and then I thought it still needed a litle something extra, so I mixed in rosemary and marinated it in olive oil. It tasted great on pizza and melted well. I think I will make cheese again next time I have sour milk, although I will play around with a different final preparation.
Read More
Posted in Eats: Condiments Dips Pickles, Eats: Gluten Free, Eats: Meaty | No comments

Monday, March 14, 2011

Making Butter

Posted on 9:48 PM by Unknown

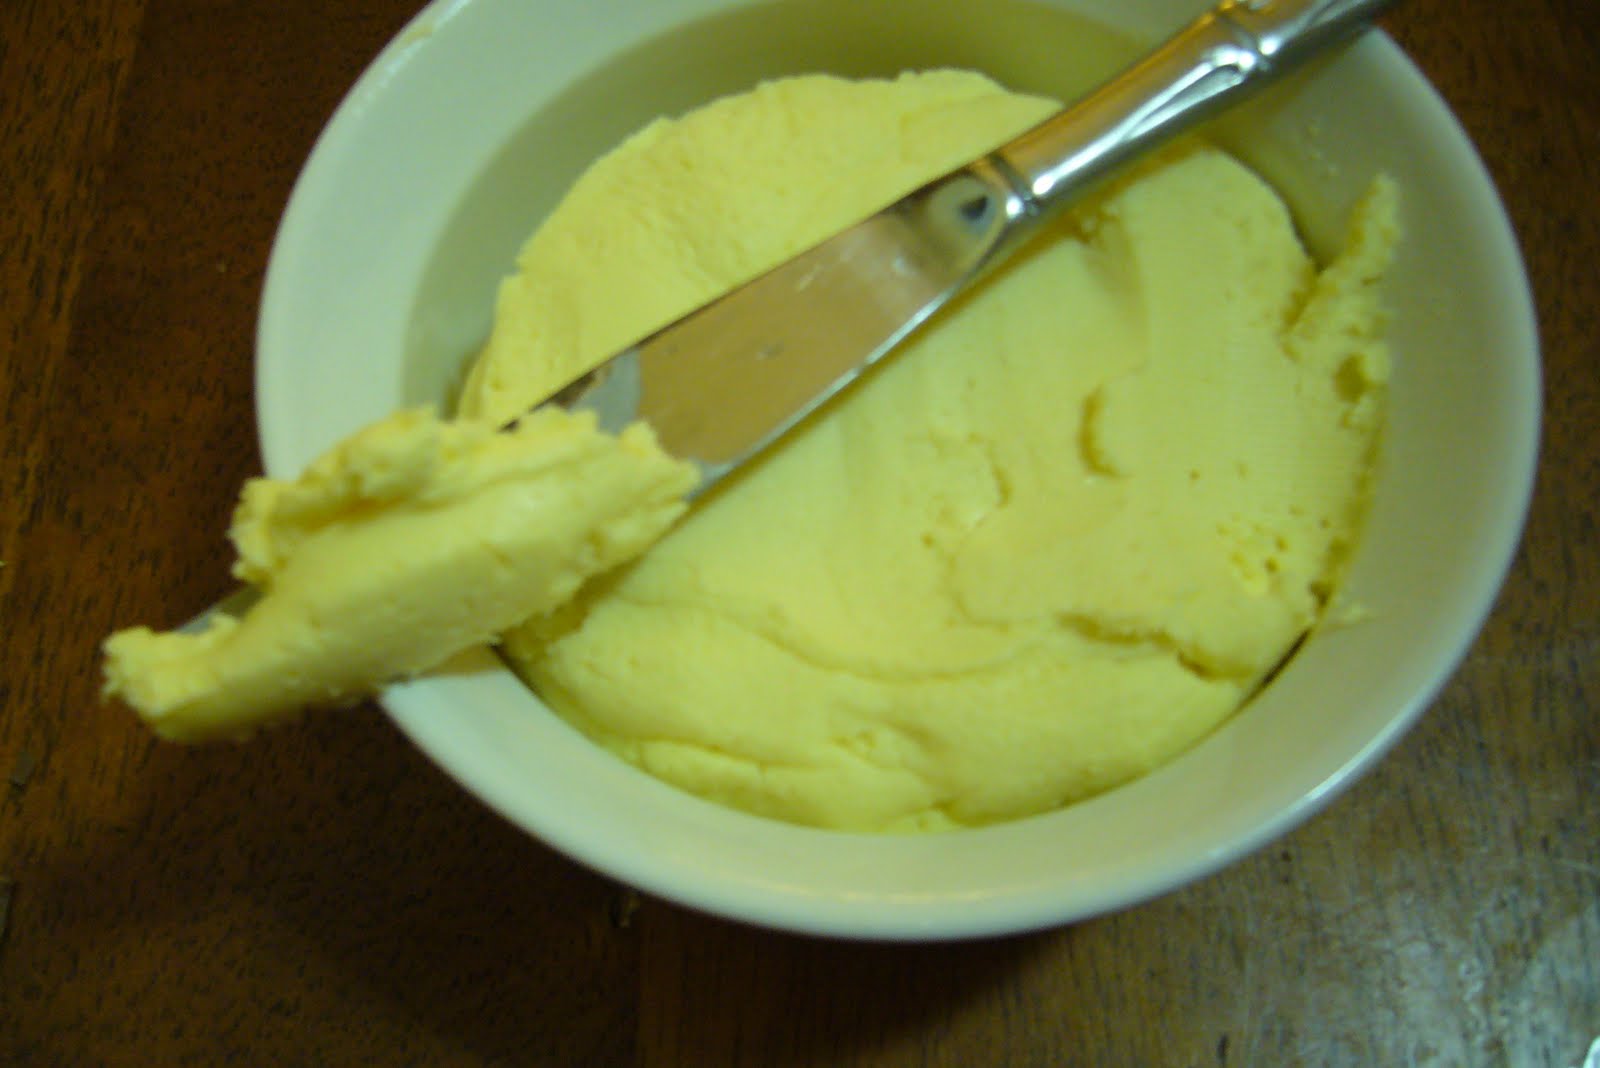
I recently joined the Bushwick Food Coop, which gives me access to raw, organic, grass fed dairy from an Amish farm in Pennsylvania. I was strangely craving ice cream last week despite the cold weather, so I ordered heavy cream in addition to my usual milk. However, feeling lazier this week and having run out of butter, I decided to give a whirl at turning my cream into butter instead. You can theoretically do so by shaking a mason jar of cream over a half hour, but I don't have an empty jar to spare right now (all are housing bulk goods), and butter can be made in just a few minutes in a food processor or stand mixer.


I followed Kelly's lead over at eat make read. Sure enough, the transformation went through all the proper phases as I paused the food processor every minute or so to check on progress: cream turned into thick white whipped cream and then into yellower crumbly soft butter. Next, liquid began to spray the sides of the food processor as the buttermilk separated from a mass of solid butter.


I strained the buttermilk to save for baking. The final step was to rinse the butter in extremely cold water while kneading it a bit until the water ran clear and then to dry it in a paper towel or cheesecloth. A pint of cream will give you about one cup of butter, good in the fridge for roughly one week.


I'm going to a potluck this weekend. What should I make to highlight this tasty butter? Bread to serve with herbed butter? Buttermilk scones or biscuits? Empanadas? Any other ideas? Help me decide!
Read More
Posted in Eats: Condiments Dips Pickles, Eats: Gluten Free, Eats: Meaty | No comments

Tuesday, November 9, 2010

Canning Pickles and a Word about Skillshares

Posted on 7:03 PM by Unknown
At the skillshare in September, we also made pickles and pizza, in addition to beer. We followed a recipe for canned garlic and dill pickles that Sarah learned at a pickling class at the Brooklyn Kitchen led by Bob McClure. I thought I didn't like fresh dill in my pickles, but I was wrong, because these were great and tasted simply as pickles should. In fact I liked them so much that I was willing to join a daring round of shots of pickle brine when we found ourselves snacking on the finished pickles a week later.


I'd only ever made lazy refrigerator pickles using storebought pickling spice mixes, which is easy and quick for making a jar at a time. Canning is a longer process, but worth it if you want to stockpile pickles. Afterward, we worried that the cans didn't sealed properly and decided to store them in the fridge, but it turns out they had indeed sealed. We put them in the fridge too early, but you should leave your cans out overnight to completely cool before testing the seal. Click here for more on how to know if your cans sealed.


As for skillshares, they have been popping up as a cheap alternative for learning new skills and trying new activities without having to pay for classes. Brooklyn is now home to its own annual Brooklyn Skillshare day each fall with classes ranging from composting to yoga to bike repairs. Skillshares can also be a great way to spend time with friends or get to know your community better. Ours was smallscale with just three people and three food-related skills, but even so, I have a few tips.

* Figure out ahead of time what you will need to bring with you. We got a late start because our host didn't have all the kitchen tools on hand (tongs, etc) we assumed he might, so there were some runs to pick up supplies.

*Plan complementary activities. For example, beer brewing and canning both require long periods of boiling in a giant pot, and there was only one giant pot, so it probably wasn't the best idea to do them in the same day. It all worked out okay, it was just a late night by the time everything was finished.

*You might also want to make plans for food or breaks. Originally I was going to bake bread as my skill, but I am really glad that I made pizza instead so that we were able to have a meal during the long day.

What skill would you teach if you organized a skillshare with your friends?


McClure's Garlic and Fresh Dill Canned Pickles

3 lbs small pickling cucumbers (Kirby)
6 cloves of garlic
1 bunch of dill
1 1/2 cups of water
1 1/2 cups distilled white vinegar (5%)
little less than 1/2 cup picking or Kosher salt
crushed red pepper (optional)
6 canning jars

1) Wash cucumbers and place in a large deep bowl with ice. Cover and put in fridge.
2) Wash dill and chop off roots
3) Place minced garlic in a small bowl and pour hot vinegar over it. Let stand for 1 minute then pour vinegar out.
4) Fill a large pot with water. Place a jar in the pot and make sure the water is at least 1 inch above the top of the jar. Remove the test jar and bring water to a boil.
5) In another large pot, combine the vinegar, water, and salt. Bring the brine to a rapid boil. Stir the salt to make sure it doesn’t stick to the bottom of the pot
6) While pots are getting up to a boil take cucumbers out and quarter them. Make sure cucumber will stand 1/4 to1/2 inch below the rim of the jar.
7) After water is boiling, submerge mason jars and lids in pot and sterilize for about 90 seconds. Remove carefully with jar tongs.
8) In each jar, place garlic, dill and then enough cucumber spears to fill the jar, making sure cukes are below the “neck-line”.
9) Fill jars with hot brine and add an optional pinch of crushed red pepper.
10) Cap and seal jars. Turn them over to make sure you have an adequate seal. Repeat until all jars are complete
11) Place jars back in boiling water pot. Process sealed jars in boiling water for 10 minutes.
12) Let cool. Wait a week to two weeks before eating. Pickles will keep up to 1 year if stored in a cool, dry place.
Read More
Posted in Eats: Condiments Dips Pickles, Eats: Gluten Free, Eats: Meaty | No comments

Wednesday, September 15, 2010

How to Eat at Summer's End

Posted on 9:30 PM by Unknown
Somewhere along the way, I forgot to keep taking photos of my farmers market hauls, but I've still been bringing home bags of produce and finding time to cook despite my newly busy schedule. This time of year, I like to focus on tomatoes, peppers, and eggplant, which in past summers, I would have grilled and turned into caponata. Lacking a grill has required me to get a little more creative this year. Below are some dishes I've enjoyed in the past couple weeks, showing how seasonal vegetable driven meals can be as lazy or as complex as you have the time and inclination for.

For a still hot summer night when you don't feel like cooking:
Deconstructed cheese and tomato sandwiches

Top one cube of Bread Alone organic baguette with one slice of Bobolink grass fed cheddar and one cherry tomato (preferably from a mother's garden) and pop in mouth. Chase with a sip of Troegs Sunshine Pils.


For a cooler late summer Sunday when you have time for a cooking project, so that you can eat quick meals with little prep later in the week:
Roasted red pepper hummus

Cook a large batch of dried chickpeas, let cool, drain, and apportion into jars in freezer for future meals. Also roast two or three red peppers until blackened on each side, remove skins, slice into strips, and marinate in olive oil and garlic in refrigerator. Either that day or sometime in the next week, prepare the hummus - thaw one jar of cooked chickpeas, and blend in food processor with 1/2 cup roasted red peppers, a generous stream of olive oil, 2 tablespoons of tahini, juice of 1/2 lemon, and a sprinkling of crushed hot pepper. Serve this special sweet and spicy hummus with warmed pita as an appetizer or as a dinner for one.


For a cool evening when you have time to make a more complicated dinner, company to help, and/or a desire for leftovers:
Eggplant parmesan sandwiches

Slice one large eggplant into thin rounds. Salt heavily and let drain in colander for 30-60 minutes, rinse, and dry with paper or cloth towels. Dredge eggplant in a bowl of beaten egg and then in a plate of homeground breadcrumbs. Fry in a shallow layer of hot oil until browned on each side. As you dredge and fry, have a helper remove the cooked eggplant from the pan and layer it in a baking dish with homemade tomato sauce and grated parmesan cheese. Warm in oven for 5-10 minutes until cheese is melted, alongside slices of Amy's rustic Italian bread drizzled with olive oil. Plate sandwiches, enjoy with a red wine, and remember to thank your helper for doing the dishes.


Read More
Posted in Eats: Beans, Eats: Condiments Dips Pickles, Eats: Gluten Free, Eats: Vegetarian, Eats: Veggies | No comments

Sunday, June 13, 2010

Garlic Scape Pesto Pizza / Quinoa Salad

Posted on 8:39 PM by Unknown

I've written about garlic scapes here before. Bright green stalks that shoot from the tops of young growing garlic in June-ish, scapes evoke a wild flavor similar to how you'd imagine summer grass to taste.


To create a vivid and creamy garlic scape pesto: Collect a handful of scapes, a handful of parsley or basil, depending on what looks good in the garden, a handful of walnuts or pine nuts or almonds, many glugs of olive oil, a little bit of vinegar for a kick (optional), and shreds of whatever hard cheese might be found in the fridge, and blend it together.

I used this scape spread to assemble a green and white pizza, along with crumbles of goat feta, fresh chopped leeks, bits of kalamata olives, and a scattering of crushed hot pepper. The combination was delicious, but almost over-the-top so from all the salt in the cheese and olives. Next time, it's one or the other - parmesan in the pesto or feta in the mix - not both.

Extra pesto-feta-olive-leek mix went into a quinoa and chickpea salad. Despite repeated attempts, I have a hard time enjoying quinoa, but hiding it in the garlic scape pesto worked for me. I think this pesto also has a future in a pasta salad with some tiny sliced cherry tomatoes.

Have you tried garlic scapes? What's your favorite preparation?
Read More
Posted in Eats: Condiments Dips Pickles, Eats: Gluten Free, Eats: Meaty, Eats: Pizza and Bread | No comments

Sunday, July 26, 2009

Fourth of July BBQ

Posted on 12:40 PM by Unknown
We had a small dinner party for Fourth of July with all the quintessential fare. No Fourth would be complete without corn of the cob (first of the season from a Jersey farm); potato salad and coleslaw; strawberries & blueberries for dessert; and grass fed burgers with all the fixings: lettuce, tomato, onion, cheese, and pickled swiss chard stems.


Oh WAIT something there is not like the others - pickled chard. But I happened to have a whole lot of swiss chard in the fridge and didn't know what else I'd do with all those stems, so I tried to pickle them, adapting this recipe from the New York Times. The pickled stems were just okay for snacking, but great on the burgers, adding a little brightness and vinegary complexity.


I also spruced up the average coleslaw by including broccoli. Inspired by Smitten Kitchen's broccoli slaw, but a world away. With a mustard-based vinaigrette instead of mayo because we were already getting plenty of mayo in the potato salad. The coleslaw was a hit and I'd make it again.


On a side note, we didn't get to see any fireworks (thanks a lot to Macy's for leaving all of Brooklyn in the dark) but I didn't care.

Pickled Swiss Chard Stems
1 bunch swiss chard stems (discard the leaves for cooking another time)
3 tbsp (?) olive oil
3 tbsp (?) vinegar
1 tsp pickling spices (can be bought at supermarkets)
1/2 tsp sugar
1/2 tsp Salt
pepper

Cut stems in pieces 1/2-inch wide and 2 inches long. Bring a saucepan of water to a boil, add stems and simmer for 10 minutes until chard is softened. Drain and place stems in a small jar. Combine oil, vinegar, pickling spices, sugar, salt, and pepper. Pour liquid mixture over stems into jar. Let marinate at least a few hours before serving. Keep in regrigerator up to two weeks.

Mustard Broccoli Slaw
1 head broccoli
1/2 head of cabbage
few carrots
1/2 onion
3 tbsp (?) olive oil
2 tbsp (?) vinegar
3 tbsp (?) mustard
2 tsp (?) sugar
1/2 lemon, juice and zest
1 tsp dried thyme
salt
pepper

Thinly slice broccoli, cabbage, carrots, and onion (or use slicer blade in food processor - but I handsliced because I'm afraid of the special slicer blade). Combine in a bowl with remaining ingredients and add more oil/vinegar/mustard/sugar/salt if needed*.

* (?) Note it's been a few weeks since I made these recipes so I don't remember the exact processes, and I tend to just kind of throw in ingredients and adjust to taste, so take these measurements with a grain of salt.
Read More
Posted in Eats: Condiments Dips Pickles, Eats: Gluten Free, Eats: Sides n Snacks, Eats: Vegetarian, Eats: Veggies, Entertaining | No comments

Friday, July 10, 2009

Garlic Scape Pesto

Posted on 6:00 PM by Unknown
Garlic scapes are the edible curlicue shoots that emerge out of the ground as the top part of the plant in springtime, before the garlic bulb itself is edible. Here in New York, scapes came into season in late May and are still around now, so you might be able to find them at your local farmers market.

Scapes have a spicy garlic flavor, which you can mellow out by sauteeing them, but I prefer to turn garlic scapes into pesto.

I spread the pesto on sandwiches as a spicy alternative to mustard...


Add it to mayonnaise for a dipping sauce that feels like the essence of springtime...
(Here it went especially well with roasted potatoes, asparagus, and grilled soft shell crabs)


And freeze it in an ice cube tray so that I can defrost only as much pesto as I need later in the season.

It's easy peasy to make if you have a food processor or blender. I use almonds because that's what I tend to have on hand, but you could also sub in walnuts or pine nuts - it's flexible. And I like to add vinegar for an extra kick, but you could leave that out. Other great optional ingredients include: parmesan, lemon juice, basil, parsley, other herbs.

Garlic Scape Pesto
1 lb garlic scapes
1/4 cup almonds
1/4 cup olive oil
1/4 cup vinegar
salt
pepper

Combine ingredients in food processor until smooth. Add additional oil or vinegar until it reaches a creamy consistency and desired taste.

first photo via flickr
Read More
Posted in Eats: Condiments Dips Pickles, Eats: Gluten Free, Eats: Sides n Snacks, Eats: Vegetarian, Eats: Veggies | No comments

Thursday, October 16, 2008

Pickled Peppers

Posted on 6:21 PM by Unknown
As we move deeper into fall and away from the bounty of summer's harvest, I've made some efforts to preserve some summery foods recently, knowing full well what long months of potatoes, kale, and root vegetables lie ahead after last winter. But it's been a kind of half-hearted effort because there's not much you can fit into this freezer. I could have tried to can stuff, but that scares me and I was too lazy to do enough research to figure out how to get over my fear of botulism.


You can't see it all very well because it's hidden by more usual freezer goods such as tupperwared lunches and various flours and coffee, but my freezer now contains: five ears of corn; six quarts of raspberries; two quarts of oven-dried grape tomatoes,; about 8 oven-dried red pepper strips; and three small bags of quartered tomatoes. I can't imagine that will last me very long this coming winter, but it will at least be good for some casseroles, flavored dips and breads, soups and pastas. I let the berries freeze spread out on a flat tray at first, before combining them in a tupperware, so that I'll be able to scoop them out for smoothies, baked goods, and pancakes as needed.

My mom grew an overabundance of cubanelle and banana peppers in her vegetable garden this year, so I've happily taken a bunch off her hands to make pickled peppers, similar to hot peperoncinis. The recipe is based loosely off Jen's recipe for pickling cucumbers at Last Night's Dinner, adapted for making just one pint jar at a time and based on what I have on hand. My first batch didn't have enough heat, so I also added some jalapenos from the Greenmarket into my most recent batch, and hopefully they'll turn out hotter and spicier. I also must say that I think I like pickled peppers better than my homemade pickled cucumbers (that's why you never even heard about them on here). And I think these peppers would be great on a turkey and cheese sandwich...in fact I might just make that for a picnic this weekend.


Pickled Banana Peppers

3/4 cup hot tap water
1/2 cup distilled white vinegar
1 tbsp sugar
1 1/2 tsp Kosher salt
4 cloves garlic
1 tsbp pickling spice
1 tsp crushed red pepper
1 tbsp whole peppercorns
Several (about a quart) of banana or cubanelle peppers
A few jalapeno or other hot peppers

Combine brine ingredients in a large liquid measuring cup (this will make it easier to pour into the jar later than if you were using a bowl) and stir until salt and sugar are dissolved.

Chop peppers into desired size - strips, chunks, or (my favorite) round crossections.

Place one third of the peppers into a clean glass pint jar, and pour a third of the brine over the peppers. Repeat until jar is full, compressing peppers as needed (a lot more will fit in one jar than you might expect!), and make sure to scoop any straggler spices out of the measuring cup and into the jar.

Refrigerate for a week before eating; pickles will stay good in the fridge for up to a month.
Read More
Posted in Eats: Condiments Dips Pickles, Eats: Gluten Free, Eats: Veggies, Eco-conscious | No comments

Monday, September 15, 2008

Roasted Garlic Herb White Bean Dip

Posted on 8:58 AM by Unknown
I haven't felt very inspired when it comes to cooking lately. My life is still all out of sorts, and I've moved but not really, so half of my cooking supplies are in one apartment, and half of them are in another. I made a couple of meals this week, but neither is worth dishing out to the blogosphere (pasta with roasted tomatoes and chicken; attempted indian spiced crock pot vegetables).

There's just one thing I've made recently that was a huge hit, unexpectedly. I had a "housewarming" party (for an apartment I haven't really been living in) last weekend, so I whipped up a white bean dip on the fly, not sure what to expect having never tried making a spread with white beans before, but everyone loved it. White bean dip is so flexible. I thought it would taste great with sundried tomatoes or roasted red peppers, but I didn't have time to procure those, while fresh herbs beckoned from my deck.

This week, as cool fall air begins to set in, I've really been itching to bake up a storm of sweet treats to satisfy my daily afternoon chocolate cravings, so hopefully you'll see some delectable baked goodies on here soon.

Roasted Garlic and Herb White Bean Dip

1 can white beans or 2 cups of home cooked beans 
2 heads of garlic, whole, unpeeled
1/4 cup olive oil
a few handfuls of fresh herbs such as parsley, sage, rosemary, thyme, or marjoram
zest and juice of 1/4 lemon
salt
pepper

Through the garlic onto the baking sheet while making crackers. After about ten minutes, when the crackers are done, squeeze the garlic out of its peels. Throw all ingredients in a food processor and blend until smooth and creamy. Add additional seasoning as needed. Spoon into a serving dish. Reserve a few of the fresh herbs to sprinkle over top. Serve alongside crackers.
Read More
Posted in Eats: Condiments Dips Pickles, Eats: Gluten Free, Eats: Meaty, Eats: Sides n Snacks, Eats: Vegetarian, Entertaining | No comments

Monday, August 4, 2008

The Dog Days

Posted on 8:25 PM by Unknown
A simple dinner tonight of pasta caponata and a smoothie, that I forgot to photograph. So here are some pictures of my dog Spencer instead; more on him below.

I first made caponata last week, and munched into it atop toasted whole wheat bread spread with goat cheese, inspired by lunch I had a while ago at Landmarc in the Time Warner Center. Caponata is a Sicilian dish of eggplants, peppers, and/or tomatoes and other veggies, diced and cooked together until soft and mushy, spiced with olives and capers. However, olives and capers aren't local or budget friendly, so I left them out, and didn't find my caponata lacking at all. Instead I spiced it up with lemon, crushed red pepper, and red wine vinegar, which were already handy in my pantry.

Tonight I had tomatoes, eggplant, and peppers from the farmers market waiting patiently in the fridge to become caponata again. But I didn't have enough bread to serve it on, so I decided it would work just as well with pasta. And it did, though I found myself craving a little sausage in there too. Most recipes for caponata call for you to roast the eggplant first, but in New York City's oppressive summer heat, I grilled the eggplant, and it was a much quicker way to tenderize rounds of slightly-chared and oiled eggplant.

For dessert I made a peach and nectarine smoothie with Ronnybrook yogurt. I don't like to eat fruit or yogurt on its own, but I do like them in smoothies and baked goods. So I decided I would buy the ingredients at the farmers market to make smoothies, in a concerted effort to be healthier. Since I'm not a big fan of peach flavor, I also threw in the last of some frozen strawberries that had been hanging around in my fridge for, oh at least six months, to brighten the flavor - but if you like peach, then plain ice cubes will do just fine for cooling down your drink.


And as for the dog days...does anyone have advice for remedying a sweet-turned-vicious dog? We adopted our dog from the shelter and accepted his growling nature toward other dogs as a hazard of his troubled past. Because he's just so darned cute, and, though he doesn't like other dogs, he loves people and is a bit of a whore with seeking out petting from other people on the street.

Until suddenly after two years, for the past two weeks straight he has started growling and trying to bite random people. For no apparent reason. The people he targets run the gamut of teenagers, old ladies, construction workers, and guys just sitting on their stoop. It's scary, and I don't know what to do. And it's so bizarre! It's bad enough that I have to walk this guy every day when I could be getting a few more minutes of precious sleep or gallavanting about town instead of coming straight home after work, that we leave the energy guzzling AC on during the day for him (at 75-77 degrees), and that he gets a full third of the bed at night! And now he's turned into a devil dog! But then he's just so darned cute and lovable with us, and you have to forgive him/forget all his sins...

Grilled Eggplant Caponata
olive oil
1 onion
3 cloves garlic
3 green peppers
3 tomatoes
1 large or 2 small eggplants
zest and juice of 1/2 lemon
1 1/2 tsp red wine vinegar
1/2 tsp crushed red pepper
1 1/2 tsp dried oregano
salt
pepper

Dice onion and mince garlic and sautee in olive oil over low heat. Dice peppers and then tomatoes and add to pan. Let cook over low heat, with the tomato juices simmering away slightly.

Meanwhile, slice eggplant into thin rounds, brush with olive oil, salt, and pepper. Grill over medium heat, about 4 minutes on each side, until eggplant is tender with browned grill marks. Remove from grill. After eggplant has cooled a few minutes, dice eggplant and add to the pan, along with the remaining ingredients. Continue to sautee another 5-10 minutes, until vegetable mixture is evenly softened and flavored.

Serving suggestions:
Toast slices of bread, top with goat cheese or mozzerella, and then top with caponata.
Let caponata cool in the fridge, and then eat with pita chips on a hot summer day.
Make 4 servings of pasta, toss pasta with caponata along with 1 tbsp olive oil and 1/3 cup grated parmesan for caponata pasta.
As an accompaniment to fish or chicken.

Peach and Nectarine Smoothie
1 small peach
1 small nectarine
2/3 cup yogurt
1 1/2 tsp honey
2 frozen strawberries or ice cubes

Wash and roughly chop peach and nectarine. Add yogurt and honey to blender, followed by the fruit and frozen strawberries or ice cubes. Blend until smooth. Makes one whopping glass or two small glasses.

Read More
Posted in Eats: Condiments Dips Pickles, Eats: Eggs and Brunch, Eats: Gluten Free, Eats: Grillin', Eats: Pizza n Pasta, Eats: Vegetarian, Eats: Veggies, Imbibing, One Local Summer Challenge, Pups | No comments

Thursday, July 31, 2008

Tortilla and Tomato Time!

Posted on 6:00 AM by Unknown
As soon as tomatoes and corn both came into season last week, I couldn't wait to make tacos with beans, fresh salsa, and homemade tortillas. And then I liked my tacos so much that I couldn't wait to make them again for dinner last night.
I am not happy that most tortillas I can find in stores around here are filled with incomprehensible ingredients, including the dreaded high fructose corn syrup. Then I saw Liz making her own tortillas and wanted to give it a try. After all, it is easier and faster than making bread because yeast isn't even involved!

I ended up adapting Orangette's recipe and cut it in half because I didn't want to push my luck on this floury experiment; replaced half the flour with local whole wheat flour; and replaced the shortening with butter. My first time around, I made the mistake of greasing the skillet and dividing the dough into too few tortillas, so I ended up with some huge greasy creatures. On my second try last night, I cooked the tortillas dry in my cast-iron skillet and they came out a little more uniform and pliable. They were not at all like store-bought tortillas, but were thick, hearty, and chewy, owing to the high proportion of whole wheat flour. Once I pick up more all purpose flour, I will try making lighter versions of these tortillas. Nevertheless, I liked them enough to gobble up the extra tortillas plain (both times I made them!) Oops. All the more reason to make them again!

And so, last night's dinner: tacos with homemade tortillas made with local whole wheat flour; dried pinto beans soaked and simmered until tender (not local); fresh salsa featuring sweet farmers market tomatoes, corn, and onions, cilantro from my deck, along with a handful of the meager tomato harvest from my deck (so far just one Big Boy and a bunch of tart cherry tomatoes); and a touch of grated Bobolink cave-aged cheddar. And lucky me, I have two more tacos all wrapped up in foil awaiting me for lunch again today!
Whole Wheat Tortillas
1 cup all-purpose flour
1 cup whole wheat flour
1 cup water
3 tbsp butter
3/4 tsp salt

Bring about 1 cup of water to boil. Meanwhile, combine flour and salt in a bowl, and mix in butter. Add half of the boiling water and stir to combine. Continue to add water slowly, using only enough water as necessary until it comes together into a dough. With floured hands, knead the dough for 3-5 minutes in the bowl (this is my trick - your bowl is probably big enough to just knead in the bowl instead of dirtying another surface). Form dough into a ball, place back in bowl, and cover bowl with plastic wrap. Let rest at least 20-60 minutes. (Or up to one day in the fridge, and then let the dough come to room temperature again before rolling out.)

With floured hands, divide dough into about 10 small balls. Heat a dry skillet. On a floured surface, roll out tortilla as thin as you can get it. Cook on skillet over medium low heat for 1-2 minutes until it puffs slightly and the bottom turns golden brown. Flip tortilla and cook 1 minute longer, until the other side turns golden brown. While this tortilla cooks, roll out the next one so that it is ready to place on the skillet as soon as the first one is done. The idea is to keep rolling out the next tortilla while the previous one cooks. Repeat until you are finally done with all that rolling and flipping, and you can sit and fill your tortillas and feast. Makes 10 fajita-size tortillas (I like to eat my tacos on fajita-size tortillas - but I'm guessing this would probably made about 15 taco-size tortillas or 7 burrito-size tortillas).

Fresh Tomato and Corn Salsa
3 tomatoes
2 ears of corn
1 onion
1 handful cilantro
salt
pepper
cayenne pepper
pot of water

Bring a pot of salted water to boil. Meanwhile, shuck the corn. Once the water is boiling, add the corn to the pot, bring it back to a boil, and then shut off the heat and let it sit for five to ten minutes before removing corn with tongs to cool.

Meanwhile, dice onion, cilantro, and tomatoes and combine in a bowl. Once the corn is cool enough to handle, slice the corn off the cob and mix it in with the rest of the salsa, along with salt, pepper, and cayenne pepper.
Read More
Posted in Eats: Condiments Dips Pickles, Eats: Pizza and Bread, One Local Summer Challenge | No comments
Older Posts Home
Subscribe to: Posts (Atom)

Popular Posts

  • Beet and Roasted Garlic Cheese Crostini
    My parents made a monumental trip the other day - not in distance, as it is only 56 miles from their home to mine , but psychologically, sin...
  • a New Economy
    While I feel good about my personal efforts to cut back on consumption and not suport big corporations, some have remarked to me that, ...
  • A Day in My Life
    I'm over at the Green Phone Booth today, where I'll now be blogging every so often. To introduce myself to the booth, I've shar...
  • The Snow Bunny
    Another big snowfall a week ago. Funny how that childhood longing for a snow day never goes away. When I woke up and found piles of fresh sn...
  • Thanksgiving and Dried Flowers
    Thanksgiving has come and gone. I contributed roasted brussel sprouts and my mini apple pies and pumpkin cupcakes ( and whoops, realized I...
  • The Story of the Seltzer Maker
    One afternoon my boyfriend called me up at work and excitedly told me he wanted to buy a seltzer maker. I'd read about the environmental...
  • Locavore Potluck
    Last Saturday was my much anticipated locavore potluck. I had been awaiting the day since I first thought up the idea sometime over winter ...
  • Sixpoint Oktoberfest
    One of my favorite local breweries, Sixpoint , recently came out with their first Oktoberfest beer, which I tried at the release party last ...
  • The Weekend
    It was finally warm enough this weekend to walk outside bare legged (!). Makes SUCH a difference. After a pre-dinner trip to the Split They ...
  • Superfood Gluten-Free Beet Walnut Brownies
    I'm not gluten-intolerant myself (not sure I could live without pizza and bagels and bread), but I was inspired to think about incorpora...

Categories

  • Bars and Restaurants
  • Biking
  • Brooklyn
  • City Living
  • Dark Days Challenge
  • DIY
  • Eat
  • Eats: Baked Goods and Desserts
  • Eats: Beans
  • Eats: Breadstuffs
  • Eats: Brunch
  • Eats: Condiments Dips Pickles
  • Eats: Crockpot
  • Eats: Eggs and Brunch
  • Eats: Gluten Free
  • Eats: Grains
  • Eats: Grillin'
  • Eats: Meaty
  • Eats: Pizza and Bread
  • Eats: Pizza n Pasta
  • Eats: Salad
  • Eats: Seafood
  • Eats: Sides n Snacks
  • Eats: Soups n Stews
  • Eats: Vegan
  • Eats: Vegetarian
  • Eats: Veggies
  • Eco-conscious
  • Entertaining
  • Farmers Market Hauls
  • Green Phone Booth
  • Guest Posts
  • Home
  • Imbibing
  • Life
  • Life Happens
  • Life Lists
  • Manhattan
  • Mindful Spending
  • Music
  • One Local Summer Challenge
  • Outside
  • Plants
  • Pretty Things
  • Pups
  • Reads
  • Recipe Archive
  • To Do
  • Travels
  • Upstate
  • Weekends

Blog Archive

  • ▼  2013 (18)
    • ▼  October (1)
      • A Crockpot Primer and Two Bean Quinoa Vegetarian C...
    • ►  September (3)
    • ►  June (2)
    • ►  May (3)
    • ►  March (3)
    • ►  February (2)
    • ►  January (4)
  • ►  2012 (37)
    • ►  December (2)
    • ►  November (3)
    • ►  October (2)
    • ►  September (6)
    • ►  August (6)
    • ►  July (1)
    • ►  June (3)
    • ►  May (3)
    • ►  April (3)
    • ►  March (6)
    • ►  February (1)
    • ►  January (1)
  • ►  2011 (43)
    • ►  December (4)
    • ►  November (3)
    • ►  October (5)
    • ►  September (4)
    • ►  August (9)
    • ►  July (2)
    • ►  June (1)
    • ►  May (3)
    • ►  April (5)
    • ►  March (2)
    • ►  February (3)
    • ►  January (2)
  • ►  2010 (53)
    • ►  December (1)
    • ►  November (2)
    • ►  October (2)
    • ►  September (5)
    • ►  August (5)
    • ►  July (3)
    • ►  June (5)
    • ►  May (8)
    • ►  April (6)
    • ►  March (8)
    • ►  February (3)
    • ►  January (5)
  • ►  2009 (109)
    • ►  December (5)
    • ►  November (9)
    • ►  October (8)
    • ►  September (4)
    • ►  August (14)
    • ►  July (17)
    • ►  June (2)
    • ►  May (10)
    • ►  April (13)
    • ►  March (6)
    • ►  February (12)
    • ►  January (9)
  • ►  2008 (98)
    • ►  December (5)
    • ►  November (12)
    • ►  October (8)
    • ►  September (7)
    • ►  August (9)
    • ►  July (9)
    • ►  June (8)
    • ►  May (6)
    • ►  April (4)
    • ►  March (7)
    • ►  February (12)
    • ►  January (11)
  • ►  2007 (39)
    • ►  December (11)
    • ►  November (6)
    • ►  October (2)
    • ►  September (4)
    • ►  August (4)
    • ►  July (6)
    • ►  June (1)
    • ►  March (5)
Powered by Blogger.

About Me

Unknown
View my complete profile